Last Updated on October 24, 2025 by Sophy
This heart shaped cake isn’t just for Valentine’s Day — it’s a beautiful, festive dessert that fits perfectly on any holiday table. Whether you’re baking for Thanksgiving, a family celebration, or a cozy winter gathering, this easy step-by-step recipe shows you how to make a show-stopping heart cake using simple pans you already have at home. Soft, buttery, and decorated with marbled frosting, it’s a sweet way to celebrate love and togetherness any time of year.
Don’t have a heart shaped cake pan? No worries! I’ll show you how to make a perfect heart using basic pans you probably already have at home. With simple ingredients, easy-to-follow instructions, and a few creative decorating ideas, you’ll be whipping up a bakery-style masterpiece in no time—even if you’re new to baking!
So grab your apron, preheat the oven, and let’s make a homemade heart cake that’s bound to impress.
Table of Contents
Why Make a Heart Shaped Cake?
There’s a reason heart shaped cakes never go out of style—they bring a personal, emotional touch that turns any occasion into something truly memorable. It’s not just about the taste (though that’s a big win too); it’s about the message your cake sends: love, care, and celebration.
RELATED : The Best Boston Cream Cake
Whether it’s Valentine’s Day or an anniversary, this cake brings the love to any special moment.
From romantic dinners to surprise birthday celebrations, a heart shaped cake fits right in. It’s especially popular for Valentine’s Day and anniversaries, where sweet gestures matter most. But it’s also a thoughtful idea for Mother’s Day, engagement parties, or even a simple “just because” treat to make someone smile.
A Symbol of Love and Sweetness
The heart shape is instantly recognizable as a symbol of affection, and when it’s paired with soft sponge layers and sweet frosting, it becomes more than just dessert—it’s a heartfelt statement. Whether it’s chocolate, vanilla, or even red velvet, the flavor just adds another layer of love.
Great DIY Heart Shaped Cake Gift for Loved Ones
Homemade always wins when it comes to meaningful gifts. A DIY heart shaped cake is not only delicious—it’s personal. It shows time, effort, and thoughtfulness. It’s a great alternative to store-bought gifts and a sweet way to say “I love you” or “I appreciate you.”
don’t miss our : Viral 3-Ingredient Chocolate Fudge Recipe
Fun Project for Beginners and Families
The best part? You don’t need to be a pro to make this cake. In fact, it’s a fantastic project for baking beginners or something fun to do with kids. With just a round and square pan, some easy-to-mix ingredients, and a bit of creativity, you’ll be amazed at what you can create together.
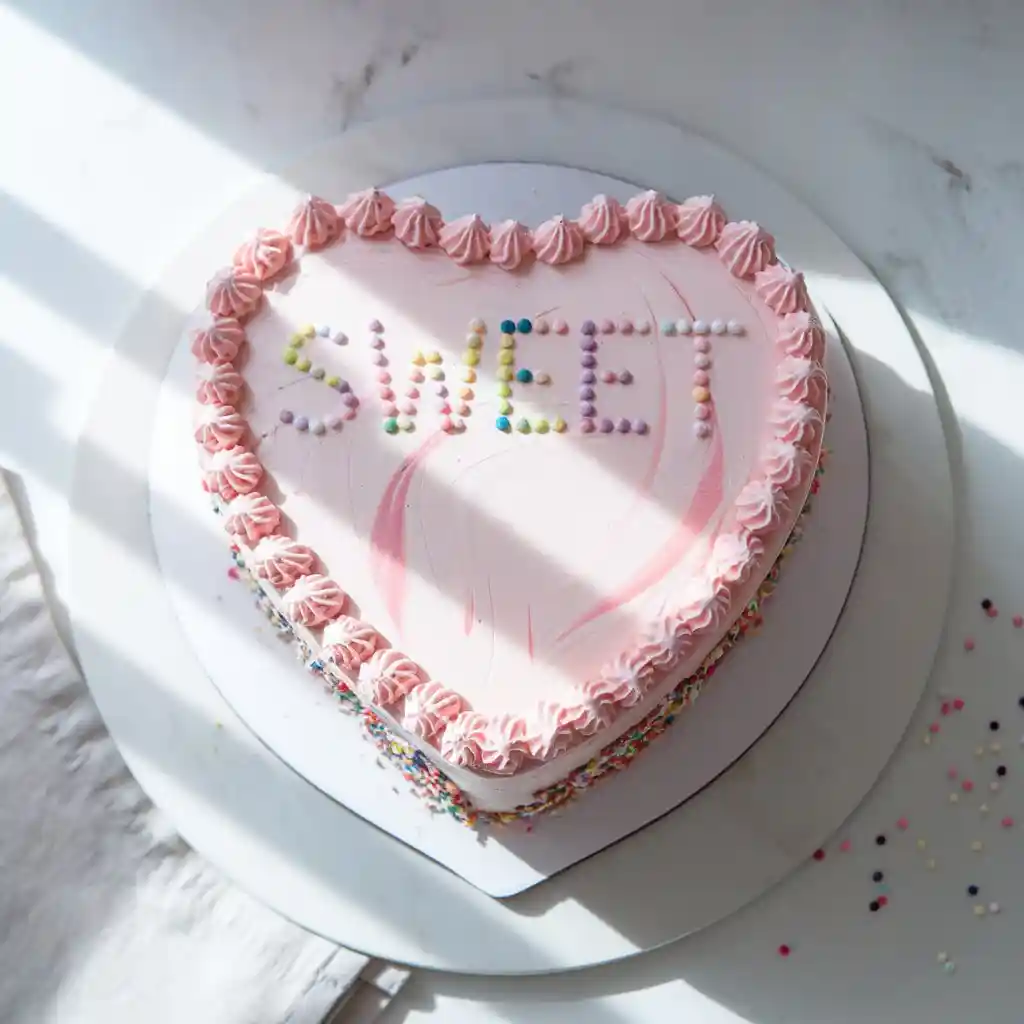
Easy Heart-Shaped Cake
Ingredients
Method
- Preheat the oven to 350°F (175°C).
- Grease and flour a square cake pan and a round cake pan.
- Prepare the cake mix according to the package instructions.
- Pour the batter into the square pan and the round pan, dividing evenly.
- Bake as per the package directions. Once baked, allow the cakes to cool completely.
- Place the square cake on a flat surface, oriented as a diamond.
- Cut the round cake in half horizontally to create two half-moon shapes.
- Attach the half-moons to the top left and right sides of the square cake, forming a heart shape.
- Gently press the pieces together to adhere.
- In a large bowl, beat the softened butter until creamy.
- Gradually add the powdered sugar, vanilla extract, and almond extract, beating until smooth and fluffy.
- Divide the frosting into three portions.
- Tint one portion with red food coloring and another with orange food coloring, leaving the third portion white.
- Spread a thin layer of white frosting over the entire cake.
- Drop spoonfuls of the red and orange tinted frostings onto the cake.
- Use an offset spatula to swirl the colors together, creating a marbled effect.
- Pat sprinkles onto the sides of the cake for added decoration.
- Cover the cake and refrigerate for up to 3 days.
- Before serving, let the cake stand at room temperature for 30 minutes to soften slightly.
Notes

Tools and Ingredients You’ll Need
Before you start baking your heart out (literally!), let’s make sure you’ve got everything prepped and ready. Don’t worry—this heart shaped cake recipe is beginner-friendly and doesn’t require anything fancy.It’s likely that most of these ingredients and tools are already stocked in your kitchen.
Basic Baking Tools (Cake Pan, Mixer, Parchment Paper, Cooling Rack)
- Square and round cake pans – No heart pan? No problem! We’ll use one 8-inch square and one 8-inch round pan to shape your cake.
- Hand or stand mixer – Great for creaming butter and getting a fluffy batter. No mixer? A sturdy whisk will work too!
- Parchment paper – Makes removing your cake a breeze and keeps it from sticking.
- Cooling rack – Ensures even cooling and prevents the cake from becoming soggy on the underside.
Tip: Lightly grease and line your pans with parchment for best results.
Key Ingredients (Flour, Sugar, Eggs, Butter, etc.)
- All-purpose flour – The base of your sponge.
- Granulated sugar – For that perfect sweetness.
- Eggs – Add structure and moisture.
- Unsalted butter – Adds richness and flavor.
- Baking Powder: Helps your heart shaped cake rise perfectly for a light and fluffy texture.
- Milk: Adds moisture to the batter, ensuring your cake stays soft and tender.
- Vanilla extract – Adds a warm, classic cake flavor.
Pro Tip: For the best texture, make sure your ingredients are at room temperature before mixing. This will create a smoother batter and help the cake rise evenly.
Optional Add-Ins (Food Coloring, Chocolate Chips, Vanilla, etc.)
- Red or pink food coloring – Perfect for creating a romantic touch, ideal for Valentine’s Day or special celebrations.
- Chocolate chips – Mix into the cake batter for a delightful, hidden treat in every bite.
- Almond or lemon extract – Add a unique flavor twist.
Tip: Customize your cake flavor to match the occasion or personal taste!
Frosting & Decorating Tools (Piping Bag, Sprinkles, Heart Toppers)
- Buttercream or cream cheese frosting – Easy to spread and decorate with.
- Piping bag with tips – For neat borders and creative designs.
- Sprinkles, edible glitter, or pearls – Add some fun and sparkle.
- Heart-shaped toppers or fresh berries – Perfect finishing touches.
Tip: If piping isn’t your thing, a simple swirl with a spatula looks just as beautiful!
Step-by-Step Instructions for Crafting a Heart Shaped Cake Without a Mold
No heart-shaped cake pan? No problem at all. One of the best things about this recipe is that you can make a beautiful heart shaped cake using just a round and a square pan. It’s an easy, creative baking trick that anyone can master, and the final result is just as charming as one made with a specialty mold.
Let’s break it down step by step so you can shape your cake with confidence.
Preparing Your Pans (Square and Round)
Start by selecting one 8-inch square pan and one 8-inch round cake pan—these will be the base of your heart shape.
Step-by-step:
- Grease and line both pans with parchment paper to avoid sticking.
- Make sure to distribute the batter evenly between the two pans. A kitchen scale helps, but visual estimation works fine.
- To prevent uneven layers, lightly tap the pans on the counter before placing them in the oven to get rid of air bubbles.
Pro Tip: Bake both cakes at the same time on the middle rack to keep cooking consistent.
Cutting and Assembling the Heart Shape
Once your cakes are baked and fully cooled, it’s time to create the heart!
Here’s how:
- Cut the round cake in half vertically to create two equal semi-circles.
- Position the square cake like a diamond (with a point facing down).
- Place the two half-circles on the top left and right sides of the square to form the rounded curves of the heart.
You’ll instantly see the heart take shape—no fancy mold required!
Helpful Tip: Use a bit of frosting as “glue” to hold the pieces together before applying your final frosting layer.
Tips to Prevent Cracks and Uneven Layers
Creating a smooth, even heart shape is easier when your cake is level and stable. Here’s how to get that perfect finish:
- Level the tops of your cakes with a serrated knife or cake leveler if they’ve domed in the oven.
- Allow your cakes to cool completely before cutting, as cutting them while warm increases the risk of crumbling or cracking.
- Apply a crumb coat (a thin layer of frosting) before the final frosting layer to lock in crumbs and smooth out the surface.
Bonus Tip: Chill the cake after the crumb coat for 15–30 minutes. This makes frosting much easier and cleaner.
Alternative Methods (Using a Template or Mold)
If you prefer a more precise or faster route, here are a couple of great alternatives:
- Heart Cake Template: Print a heart-shaped stencil online, place it over a cooled round or square cake, and carefully cut around the edges.
- Heart Shaped Cake Mold: If you bake often for special occasions, investing in a reusable heart shaped cake pan can be a time-saver.
These alternatives are perfect for bakers who love uniform shapes or want to skip the cutting step.
Good to Know: Even with a mold, following proper cooling and leveling steps is key to a polished final look.

Step-by-Step Instructions to Bake and Frost the Cake
Baking a heart shaped cake from scratch might sound tricky, but with a little guidance, it’s easier than you think! Whether you’re baking for Valentine’s Day, an anniversary, or just because, these easy-to-follow steps will walk you through the entire process—from mixing the batter to frosting the final masterpiece.
Step 1: Preheat and Prep
- Preheat your oven to 350°F (175°C).
- Grease both an 8-inch round pan and an 8-inch square pan. To ensure easy cake removal, line the bottoms of the pans with parchment paper.
- Lightly dust the sides of the pans with flour to help prevent sticking.
Tip: Prepping your pans properly ensures your cakes bake evenly and come out cleanly—no broken edges!
Step 2: Make the Cake Batter
In a large mixing bowl:
- Beat together 1 cup of unsalted butter and 1 ½ cups of granulated sugar until the mixture is light, airy, and well combined.
- Add in 3 large eggs, one at a time, making sure to fully incorporate each before adding the next.
- Stir in 2 teaspoons of vanilla extract (or substitute with almond extract if you prefer a different flavor).
In a separate bowl:
In a separate bowl, combine 2 ½ cups of all-purpose flour, 2 ½ teaspoons of baking powder, and ½ teaspoon of salt, whisking until well blended.
Next:
Gradually add the flour mixture and 1 cup of milk to the butter mixture, beginning and finishing with the flour.
Optional: Add red or pink food coloring now for a festive hue!
Step 3: Bake and Cool the Cakes
- Pour the batter evenly into both the round and square cake pans.
- Bake for 30 to 35 minutes, or until a toothpick inserted into the center comes out clean.
- Allow the cakes to cool in their pans for about 10 minutes, then transfer them to a wire rack to cool completely.
Pro Tip: A fully cooled cake is easier to cut, frost, and decorate.
Step 4: Assemble the Heart Shap
- Position the square cake at an angle, resembling a diamond shape, on your serving plate.
- Cut the round cake into two halves, then place each half along the top edges of the diamond shape to create a heart form.
- Lightly apply frosting between the pieces to hold them together.
Step 5: Apply a Crumb Coat
- Apply a light coat of frosting all over the cake to seal in any loose crumbs.
- Chill in the fridge for 15–30 minutes to set the crumb coat.
Crumb coat = smoother final finish + easier decorating.
Step 6: Final Frosting and Decorations
- Add a thicker layer of buttercream, cream cheese frosting, or ganache.
- Use a piping bag for borders or rosettes.
- Top with sprinkles, fresh berries, edible glitter, or heart toppers to match your theme.
Creative Decorating Ideas for Heart Shaped Cake
Once you’ve shaped and frosted your heart cake, it’s time for the best part—decorating! Whether you’re going for elegant, playful, or romantic, there’s no limit to the designs you can create. These ideas are beginner-friendly and sure to make your cake the star of any celebration.
Classic Romantic Theme
Nothing says love like a cake dressed in pinks, reds, and whites.
- Use rose-colored buttercream to pipe rosettes or swirls around the edges.
- Add chocolate shavings, strawberries, or mini heart candies for texture and color.
- Write a sweet message like “Love You” or “Be Mine” using piping gel or melted chocolate.
Ideal for Valentine’s Day or wedding anniversaries.
Fun & Kid-Friendly Designs
Turn your heart cake into a joyful treat for birthdays or family celebrations.
- Decorate with rainbow sprinkles, gummy candies, or even mini marshmallows.
- Let kids help by adding their favorite toppings—they’ll love being part of the fun.
- Use brightly colored frosting and edible glitter for a magical look.
This is also a fun baking activity for families with young children.
Elegant & Minimalist Style
Prefer something more modern and chic?
- Stick with a smooth white or pastel frosting for a clean, polished base.
- Decorate with fresh blooms, edible pearls, or a touch of gold leaf for an elegant finishing touch.
- Add a simple cake topper or stencil a dusting of powdered sugar in a heart shape.
Perfect for dinner parties or sophisticated celebrations.
Themed Cake Ideas
You can tailor your heart shaped cake for just about any occasion!
- Valentine’s Day: Red velvet base, cream cheese frosting, and candy hearts.
- Mother’s Day: Light sponge cake, lavender or rose frosting, and floral accents.
- Celebrate the joyous occasion with soft pastel shades and a charming ‘Welcome Baby’ cake topper to make the Baby Shower cake extra special.
Match your decorations to the season, recipient, or event theme for an extra personal touch.
Heart Shaped Cake for Holidays and Seasonal Celebrations
While heart cakes are often linked to Valentine’s Day, they’re also a charming choice for other holidays. Try decorating your cake in warm autumn tones for Thanksgiving, pastel colors for Easter, or festive red and green for Christmas. The shape stays the same — only the color and decorations change — making it a versatile dessert that adapts beautifully to every season.
For Thanksgiving, consider flavor twists like pumpkin spice or cinnamon buttercream. During Christmas, a peppermint or chocolate drizzle adds a festive touch
Storage Tips and Make-Ahead Advice
To keep your heart shaped cake looking and tasting amazing, proper storage is key. Whether you’re prepping ahead or saving leftovers, here’s how to do it right.
How to Store Your Heart Cake
- At Room Temperature:
If the cake is left without frosting or covered with buttercream, keep it in an airtight container at room temperature for up to two days. - In the Refrigerator:
For frosted or cream cheese-topped cakes, place in a cake box or wrap loosely with plastic wrap. You can store it in the fridge for up to five days to keep it fresh.
To ensure the best flavor and texture, allow the refrigerated cake to come to room temperature before serving. This step enhances the overall taste and ensures a soft, moist texture.
Freezing Instructions
- Wrap individual slices or the full cake (unfrosted or frosted with buttercream) tightly in plastic wrap and a layer of foil.
- Place the mixture in a freezer-safe container or bag, and store it in the freezer for up to 3 months.
Label the date so you don’t forget when you made it!
Make-Ahead Tips
- Bake the cake layers a day or two ahead and store them wrapped tightly in the fridge or freezer.
- Prepare frosting and decorations in advance—most frostings stay good in the fridge for 3–5 days.
- Assemble and decorate the day of serving to keep everything looking fresh and vibrant.
Planning ahead can reduce stress, especially if you’re baking for a big event.
FAQs Heart Shaped Cake
Can I make a heart shaped cake for Thanksgiving?
Yes! Use warm flavors like cinnamon, pumpkin spice, or maple. Decorate with fall-colored frosting or seasonal toppings.
Q: What are some holiday variations for this heart cake?
For Christmas, use red and green marbling. For Easter, pastel pink and yellow. For Thanksgiving, try spiced frosting and caramel drizzle.
Final Thoughts on Making a Heart Shaped Cake
Creating a heart shaped cake isn’t just about baking—it’s about sharing love, joy, and a little bit of creativity. Whether you’re marking Valentine’s Day, celebrating an anniversary, or just looking to delight someone special, this cake brings a meaningful and sweet gesture to every celebration. With just a square and round pan, a few simple ingredients, and a bit of decorating fun, you can make a stunning homemade treat that looks as good as it tastes.
So roll up your sleeves, preheat that oven, and bring your heart to the kitchen—literally!
Ready to Bake Your Own Heart Shaped Cake?
We’d love to hear about your experience with this recipe! Share your thoughts in the comments below and let us know how it turned out! Don’t forget to share your cake photos on Instagram or Pinterest and tag us for a chance to be featured.
Want more fun and easy recipes? Subscribe to our newsletter and never miss a sweet idea again!


2 thoughts on “Heart Shaped Cake”