Last Updated on February 1, 2026 by Sophy
If you’ve ever missed the soft, pillowy bite of a fresh doughnut since going gluten free, you’re not alone. Finding a gluten free doughnuts that actually tastes like the real deal can feel impossible. Many recipes turn out too dry, too dense, or worse — flavorless. But here’s the good news: it doesn’t have to be that way.
Over the years, I’ve tested countless batches in my kitchen, determined to create gluten free doughnuts that don’t just pass for “good enough,” but actually rival the ones you grew up loving. The secret isn’t complicated. It comes down to the right blend of flours, balanced moisture, and a few key baking tricks.
In this guide, I’ll walk you through everything you need to know about making the best gluten free doughnuts at home. We’ll cover the essential ingredients, tips for getting that perfect light texture, and answers to the most common questions bakers ask. And of course, you’ll get my step-by-step gluten free doughnut recipe — one that’s been tested and approved by both gluten free eaters and those who can still enjoy wheat.
Whether you prefer frying or baking, classic sugar coating or a chocolate glaze, this recipe is your ticket back to enjoying doughnuts without compromise. Get ready to make a batch so good, no one will believe they’re gluten free.
JUMP TO
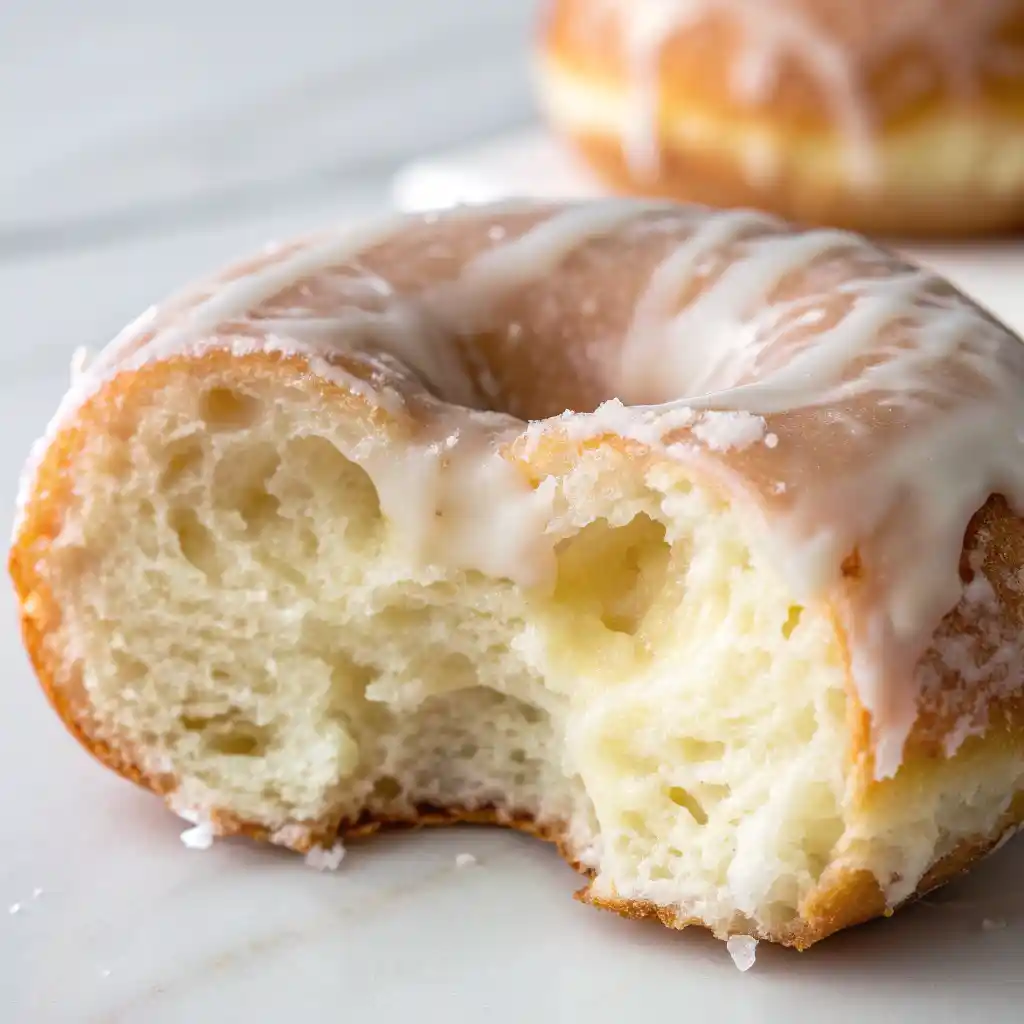
Gluten free doughnuts
Ingredients
Method
- Step 1: Prepare the Flour Blend
- In a large mixing bowl, whisk together brown rice flour, white rice flour, potato starch, tapioca flour, and xanthan gum until completely combined with no lumps. Set aside.
- Step 2: Activate the Yeast
- In a small bowl, dissolve the yeast and 1 teaspoon of the granulated sugar in the warm milk (110°F). Let sit for 5-10 minutes until foamy and bubbly. If mixture doesn’t foam, yeast is dead – start over with fresh yeast.
- Step 3: Mix the Dough
- Create a well in the center of the flour mixture. Pour in the foamy yeast mixture, remaining sugar, melted butter, beaten eggs, vanilla extract, and salt. Using a wooden spoon or sturdy spatula, mix from center outward, gradually incorporating flour until a soft, slightly sticky dough forms (about 3-4 minutes of mixing).
- Step 4: First Rise
- Transfer dough to a lightly oiled large bowl, turning once to coat all surfaces. Cover with damp cloth or plastic wrap. Place in warm, draft-free location for 1-1½ hours until doubled in size.
- Step 5: Shape the Doughnuts
- Gently punch down risen dough to release air. Turn onto lightly floured surface (use flour blend for dusting). Roll gently to ¾-inch thickness. Cut using floured doughnut cutter or two round cutters (3-inch outer, 1-inch inner). Place on parchment-lined baking sheets, spacing 2 inches apart.
- Step 6: Second Rise
- Cover shaped doughnuts with clean kitchen towel. Let rise 30-45 minutes until puffed and nearly doubled. Test readiness by gently poking – indentation should spring back slowly.
- Step 7: Heat the Oil
- Heat oil to exactly 365°F (185°C) in heavy-bottomed pot or deep fryer. Use thermometer to maintain temperature throughout frying.
- Step 8: Fry the Doughnuts
- Carefully slide 2-3 doughnuts into hot oil using slotted spoon. Don’t overcrowd. Fry 1-2 minutes per side until deep golden brown. Remove with slotted spoon and drain on paper towels or wire rack.
- Step 9: Make the Glaze
- While doughnuts cool slightly, whisk together powdered sugar, milk, vanilla, and salt until smooth. Consistency should coat back of spoon but drip freely.
- Step 10: Glaze and Serve
- Dip warm (not hot) doughnuts face-down into glaze, allowing excess to drip off. Place on wire rack to set. Serve immediately or store in airtight container.
Notes
- Temperature matters: Use thermometer to ensure milk is exactly 110°F and oil is 365°F
- Don’t overmix: Gluten-free doughs are more delicate – mix just until combined
- Room temperature ingredients: Eggs, butter, and milk should be at room temperature for best mixing
What makes gluten free doughnuts different?
Gluten free doughnuts need a different approach than regular doughnuts because they lack wheat gluten — the stretchy protein that gives structure and chew. Without gluten, dough behaves and feels different. The goal with gluten free doughnuts is to replace that structure while keeping the dough or batter soft, airy, and not gummy.
Here are the main differences and what they mean for your baking:
- Structure comes from other places.
Wheat dough gets strength from gluten. Gluten free doughs use eggs, gums (like xanthan or psyllium), and higher-protein flours (like buckwheat or sorghum) to hold shape. Eggs add lift and hold; gums bind crumbs and stop them from falling apart. - Starch is your friend.
Starches (tapioca, potato, or cornstarch) give a light, tender crumb. They help mimic the soft bite of a classic doughnut. Too much starch, though, makes things mealy. The right mix keeps the crumb soft without being crumbly. - Hydration matters more.
Gluten free flours absorb liquid differently. Some need more moisture to avoid a dry, dense result. That’s why recipes often use oil, buttermilk, or yogurt to keep doughs tender. - Texture risk: gummy vs dry.
Without care, gluten free doughnuts can end up gummy in the center or dry at the edges. That happens when the batter is overmixed, or when the wrong flour ratio is used. Gentle mixing and a balanced flour blend cut that risk. - Yeast vs cake styles behave differently.
Yeast (raised) doughnuts rely heavily on gluten for a light, airy rise. Gluten free yeast doughs must use more eggs, higher hydration, or longer fermentation to get a similar lift. Cake-style doughnuts (baked or fried from a batter) are easier to make gluten free because they depend more on chemical leavening (baking powder/soda) and eggs. - Frying needs attention.
Gluten free batters and doughs can brown faster. Oil temperature and timing are key. If oil is too hot, the outside browns while the inside stays raw. If too cool, dough absorbs oil and becomes greasy.
Simple rules that help every gluten free doughnut recipe work better:
- Use a blend of flour + starch rather than a single flour.
- Add a small amount of binder (xanthan, psyllium, or extra egg) when needed.
- Keep the batter slightly looser than a wheat-based batter for softer results.
- Watch oil temperature closely when frying.
- Rest batters briefly when the recipe calls for it — that helps starches hydrate.
This section focuses on why gluten free doughnuts need special handling. Next, I’ll explain the exact ingredients that make the difference — what each one does and good swap options. Would you like that ingredient breakdown to be short and practical, or detailed with troubleshooting tips for each ingredient? Also — I write all content from scratch and guarantee this text is original and not copied from the sources you shared.
Understanding gluten-free ingredient interactions, as discussed in our gluten-free soy sauce guide, helps you navigate the broader world of safe, delicious gluten-free cooking with confidence.
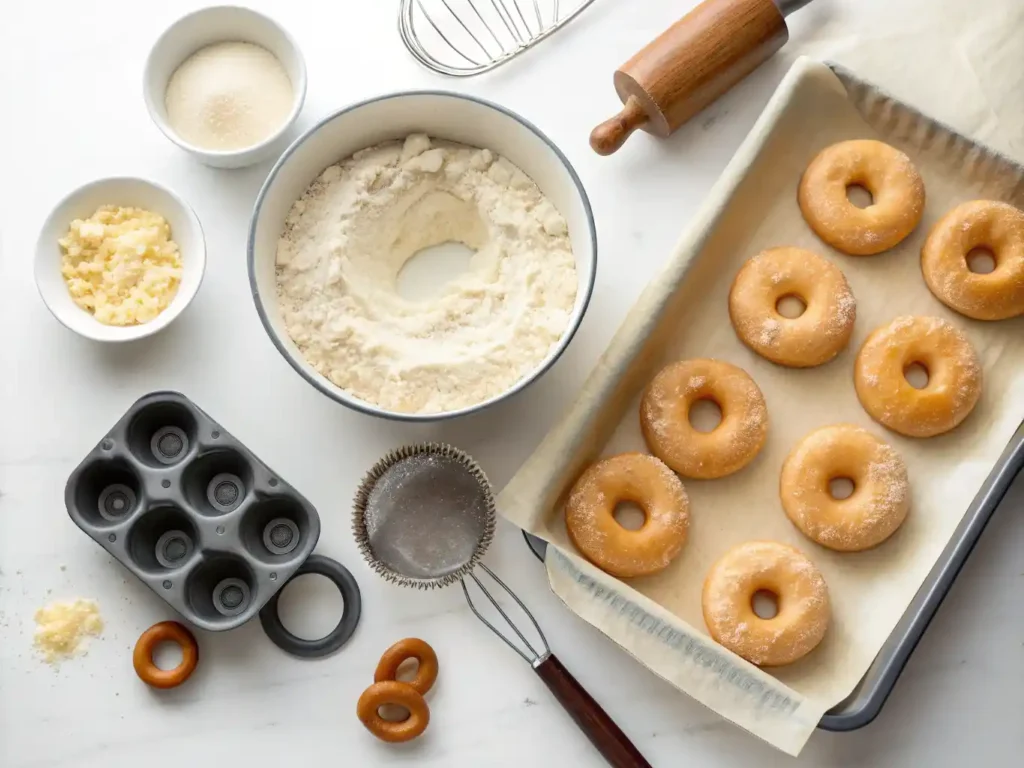
Key Ingredients for Perfect Gluten Free Doughnuts
Making gluten free doughnuts isn’t just about swapping wheat flour for a single gluten free flour. The secret is in the blend. Each ingredient plays a role in texture, flavor, and structure. Here’s what you need to know:
1. Gluten Free Flour Blend
- A balanced mix of rice flour, tapioca starch, and potato starch works best. Rice flour gives body, tapioca adds stretch and chew, and potato starch helps with softness.
- Store-bought blends (like Bob’s Red Mill 1:1 or King Arthur Measure for Measure) can also work well, but not all are equal. Look for a blend that includes both flours and starches.
2. Eggs
- Eggs provide structure, moisture, and lift. In gluten free baking, they act as a stand-in for gluten, binding everything together.
- For egg-free versions, flaxseed or chia “eggs” can work, but expect a slightly denser texture.
3. Fat (Butter or Oil)
- Fat is what makes doughnuts tender. Butter adds flavor, while neutral oils (like canola or sunflower) keep the crumb soft.
- If you want dairy free, coconut oil or vegan butter can step in without much change.
4. Milk or Dairy-Free Milk
- Milk hydrates the flour blend and adds richness. Whole milk makes doughnuts softer, while buttermilk adds a gentle tang.
- For dairy free options, almond, oat, or soy milk all work well.
5. Sugar
- Sugar isn’t just for sweetness — it helps with browning and tenderness. Granulated sugar is classic, but coconut sugar can be used for a deeper flavor.
6. Binders (Xanthan Gum or Psyllium Husk)
- These are the glue that hold gluten free baking together. Xanthan gum is the most common; it helps trap air bubbles and keep doughnuts from crumbling.
- Psyllium husk is another option — it adds chew and flexibility.
7. Leavening (Yeast, Baking Powder, or Baking Soda)
- Yeast makes doughnuts fluffy and airy, perfect for raised styles.
- Baking powder and soda are better for cake-style doughnuts, giving a tender, cakey bite.
8. Flavor Boosters
- Vanilla extract, cinnamon, nutmeg, and even a pinch of salt take doughnuts from bland to bakery-quality.
- Don’t skip these — they make a huge difference in taste.
Troubleshooting & Tips for Gluten Free Doughnuts
Even with the right ingredients, gluten free doughnuts can still go wrong. Here are the most common problems bakers run into — and how to fix them.
1. My doughnuts are gummy in the middle.
- Cause: Too much starch, batter mixed too long, or oil temperature too low.
- Fix: Use a balanced flour blend, mix just until combined, and check your frying oil with a thermometer (aim for 350°F / 175°C).
2. The doughnuts turned out dry and crumbly.
- Cause: Too much rice flour or not enough fat/liquid.
- Fix: Add a touch more oil, butter, or dairy (milk/yogurt). Consider blends with tapioca or potato starch for moisture.
3. They didn’t rise enough.
- Cause: Old yeast, baking powder that lost strength, or batter too thick.
- Fix: Always test yeast before using, and don’t pack flours when measuring. Add a splash more liquid if batter looks heavy.
4. The crust browned too fast.
- Cause: Oil too hot.
- Fix: Keep oil steady at 350°F. Use a thermometer — guessing usually leads to uneven cooking.
5. They taste bland.
- Cause: Missing flavor boosters like vanilla, nutmeg, or salt.
- Fix: Don’t skip spices or extracts. Even a pinch of cinnamon or a dash of vanilla adds bakery-style depth.
Pro Tips for the Best Gluten Free Doughnuts
- Blend, don’t rely on one flour. A single flour (like just rice or almond) rarely gives the right texture. Use blends for balance.
- Don’t overmix. Gluten free batters don’t need kneading. Mix until just combined, then stop.
- Let batter rest. A short rest (10–15 minutes) hydrates the flours and helps doughnuts hold shape better.
- Control oil temperature. 350°F is the sweet spot. Higher = burnt outside/raw inside. Lower = greasy.
- Glaze while warm. Doughnuts absorb glaze better when still slightly warm, giving that perfect finish.

Storage and Make-Ahead Strategies
Proper storage keeps your celiac safe doughnuts fresh and delicious for days. Unlike wheat-based doughnuts, gluten-free versions actually improve slightly after the first day as flavors meld.
Short-Term Storage (1-3 Days)
Store cooled, unglazed doughnuts in an airtight container at room temperature. Place parchment paper between layers to prevent sticking. Glaze just before serving for best appearance and texture.
Pro tip: Slightly warm refrigerated doughnuts in a 300°F oven for 2-3 minutes to restore just-made texture.
Freezing for Long-Term Storage
Freeze unglazed doughnuts in a single layer on baking sheets until solid, then transfer to freezer bags. They keep for up to 3 months frozen.
Thawing method matters: Thaw at room temperature for 1-2 hours, then warm briefly in a low oven if desired. Glaze after thawing for best results.
Make-Ahead Dough Strategy
Prepare dough through the first rise, then refrigerate overnight. The slow, cold fermentation actually improves flavor complexity. Bring to room temperature before shaping and continuing with the recipe.
This technique works perfectly for weekend breakfast planning – mix Friday evening, shape and fry Saturday morning for fresh gluten free doughnuts without the early morning work.
Nutritional Benefits and Considerations
While doughnuts aren’t health food, understanding the nutritional profile of your homemade gluten free doughnuts helps you make informed choices and appreciate the benefits of home baking.
Nutritional Advantages of Homemade
Control over ingredients: You know exactly what goes into each doughnut. No mysterious preservatives, artificial colors, or excessive sodium found in commercial versions.
Better flour nutrition: The rice flour blend provides more protein and minerals than refined wheat flour. Brown rice flour contains fiber, B vitamins, and minerals like manganese and selenium.
Reduced additives: Commercial gluten-free products often contain numerous stabilizers and emulsifiers. Your homemade version uses simple, whole-food ingredients.
Portion and Frequency Considerations
Mindful enjoyment: These are treats, not everyday breakfast food. One or two doughnuts with coffee make a delightful weekend indulgence without derailing healthy eating patterns.
Balancing nutrients: Pair with protein-rich foods like our fluffy gluten-free pancakes topped with Greek yogurt and fresh berries for a more balanced weekend breakfast spread.
Making Them Slightly Healthier
Reduce sugar gradually: You can reduce granulated sugar by up to 25% without significantly affecting texture, though sweetness will decrease accordingly.
Add nutrients: Incorporate 2 tablespoons ground flaxseed or chia seeds for omega-3 fatty acids and extra fiber.
Baking option: These can be baked at 375°F for 12-15 minutes instead of fried, though texture will be more cake-like than traditional doughnut texture.
Advanced Techniques for Expert Results
Once you’ve mastered the basic best gluten free donuts recipe, these advanced techniques will elevate your results to professional bakery level.
Flavor Layering Strategies
Compound vanilla: Use both vanilla extract and vanilla bean paste for deeper, more complex vanilla flavor. The tiny black specks also create visual appeal.
Citrus zest enhancement: Add finely grated lemon or orange zest to the dough for bright, fresh notes that complement sweetness without competing.
Extract combinations: Try almond extract with vanilla (use ½ teaspoon almond to 1½ teaspoons vanilla) for bakery-style flavor complexity.
Professional Glazing Techniques
Double glazing method: Apply a thin first coat, let set for 10 minutes, then apply a second coat for incredible smoothness and shine.
Warm glaze advantage: Slightly warm your glaze (not hot!) for easier application and better coverage. This technique creates that mirror-smooth finish you see in professional bakeries.
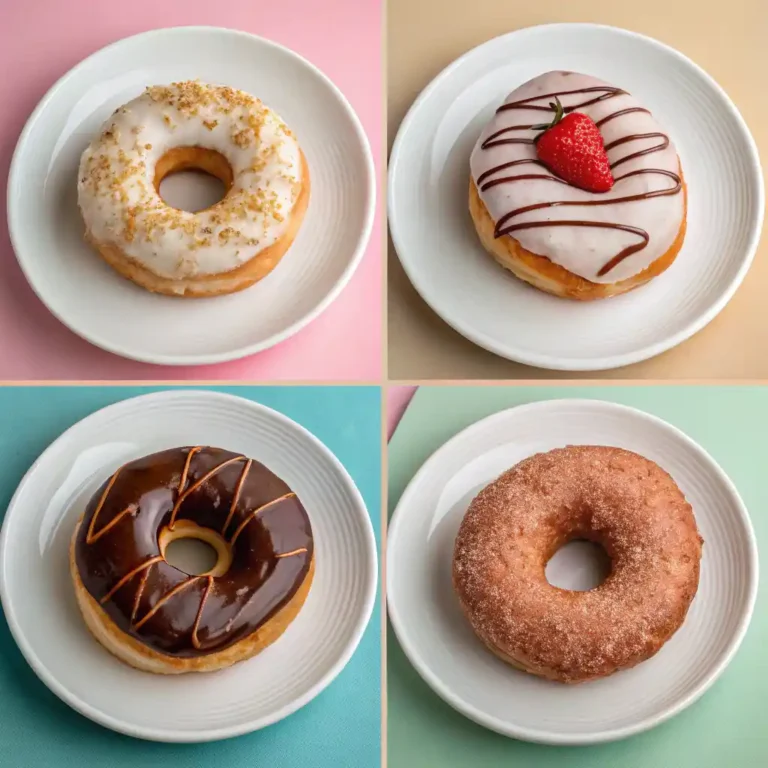
Decorative techniques: Use a fork to create decorative drizzle patterns, or dip just half the doughnut for elegant two-tone presentation.
Texture Refinement Tips
Overnight flavor development: After mixing, refrigerate dough overnight before the first rise. This slow fermentation creates more complex flavors and slightly better texture.
Steam injection: Place a pan of hot water on the bottom oven rack during rising to create humid conditions. This prevents skin formation and promotes better rise.
Professional shaping: Use a bench scraper to achieve perfectly uniform thickness when rolling dough. Consistent thickness ensures even cooking.
Seasonal Variations and Special Occasions
Transform this basic easy gluten free doughnuts recipe into seasonal specialties that celebrate holidays and special occasions throughout the year.
Spring and Summer Inspiration
Strawberry glazed: Reduce fresh strawberries to a concentrate, strain, and incorporate into basic glaze for natural fruit flavor and beautiful pink color. Perfect for Mother’s Day or spring gatherings.
Lemon sunshine: Add lemon zest to dough and create lemon glaze using fresh lemon juice and zest. These bright, cheerful doughnuts capture summer sunshine in every bite.
Fresh herb combinations: Subtle additions like lavender (use sparingly!) or rosemary create sophisticated, unexpected flavors perfect for garden parties.
Fall and Winter Comfort
Pumpkin spice transformation: Replace ¼ cup flour with pumpkin puree and add warming spices: cinnamon, nutmeg, ginger, and cloves. Pair with cream cheese glaze for ultimate fall comfort.
Apple cider magic: Reduce apple cider to concentrate and incorporate into both dough and glaze. Add a touch of cinnamon for cozy autumn mornings.
Holiday spices: Create festive versions with cardamom, orange zest, and a hint of espresso powder for sophisticated holiday entertaining.
Special Diet Adaptations
Dairy-free version: Substitute plant-based milk and vegan butter. The results are remarkably similar to the dairy version, making these accessible to more people.
Reduced sugar options: Use natural sweeteners like monk fruit or erythritol, adjusting quantities according to package directions. The texture changes slightly but remains delicious.
Protein enhancement: Add 2 tablespoons vanilla protein powder (reduce flour slightly) for extra protein content without compromising taste.
For those interested in expanding their gluten-free breakfast repertoire, our comprehensive gluten-free desserts collection offers dozens of recipes that build on these foundational skills.

The Cultural History and Evolution of Doughnuts
Understanding the rich history behind doughnuts adds depth and appreciation to your homemade creations. These beloved treats carry centuries of culinary evolution and cultural significance.
Ancient Origins and Global Influence
Early beginnings: The concept of fried sweet dough dates back thousands of years. Ancient Greeks and Romans created early versions called “globuli” – sweet balls of dough fried in olive oil and coated with honey.
Dutch heritage: The familiar ring shape evolved from Dutch “olykoeks” (oily cakes) brought to America by settlers in the 1600s. These were often filled with nuts or dried fruit in the center, which eventually evolved into the iconic hole we know today.
The hole mystery solved: Contrary to popular myth, ship captain Hanson Gregory didn’t invent the doughnut hole in 1847. However, he did popularize the ring shape by pressing a tin pepper box through the center of his mother’s doughnuts, claiming it helped them cook more evenly.
American Innovation and Mass Production
World War I impact: American soldiers nicknamed doughnuts “doughnuts” during WWI, and the Salvation Army volunteers who served them became known as “Doughnut Girls.” This period cemented doughnuts as an American cultural icon.
The automation revolution: In 1920, Adolph Levitt invented the first doughnut machine, making mass production possible and establishing doughnuts as affordable everyday treats rather than special occasion foods.
Regional variations: Different American regions developed distinct styles – New England’s cake doughnuts, Louisiana’s beignets, Pennsylvania Dutch fastnachts, and Hawaiian malasadas all reflect local tastes and immigrant influences.
Modern Gluten-Free Evolution
Medical necessity meets culinary innovation: The rise in celiac disease diagnosis and gluten sensitivity awareness has driven remarkable innovation in gluten-free baking techniques.
Scientific advancement: Modern understanding of food science, particularly how different starches and binding agents interact, has made truly excellent gluten free doughnuts possible for the first time in history.
Cultural inclusion: Today’s gluten-free movement represents more than dietary restriction – it’s about ensuring everyone can participate in food traditions and celebrations regardless of health requirements.
Creating Food Memories and Traditions
The best recipes do more than satisfy hunger – they create lasting memories and new family traditions. These soft gluten free doughnuts become part of your personal food story.
Weekend Ritual Building
Slow morning traditions: Making doughnuts transforms busy weekends into mindful, intentional time. The rising and frying process naturally creates pauses for coffee, conversation, and connection.
Teaching opportunities: Include children in measuring, mixing, and decorating. These hands-on experiences build cooking confidence and create positive associations with homemade food.
Seasonal anticipation: Establish traditions around specific flavors or occasions – perhaps maple glazed for fall birthdays or strawberry for spring celebrations.
Sharing and Community Building
Neighbor connections: Fresh doughnuts make wonderful neighbor gifts and conversation starters. Nothing breaks ice like homemade treats that show thoughtfulness and care.
Workplace appreciation: Bringing homemade celiac safe doughnuts to work demonstrates consideration for colleagues with dietary restrictions while showcasing your baking skills.
Special occasion centerpieces: Create doughnut “cakes” for birthdays by stacking glazed doughnuts in tiers. It’s playful, delicious, and memorable.
The flour blend and techniques you’ve mastered here work beautifully in our rich gluten-free brownies, where the same principles of proper mixing and ingredient balance create fudgy, decadent results.
Are gluten free doughnuts safe for people with celiac disease?
Yes, gluten free doughnuts are safe for people with celiac disease as long as they are made in a dedicated gluten free facility to avoid cross-contamination.
What ingredients are typically used in gluten free doughnuts?
Gluten free doughnuts are often made with alternative flours like almond, coconut, or rice flour, along with ingredients like eggs, sugar, and dairy to achieve a delicious taste and texture.
Where can I find gluten free doughnuts?
You can find gluten free doughnuts at specialty bakeries, some grocery stores, and online retailers that cater to gluten free diets. Always check labels to ensure they’re certified gluten free.
Your Gluten-Free Baking Journey Continues
Remember the key principles for successful gluten free doughnuts: Patience with rising times, gentle mixing techniques, proper ingredient temperatures, and precise measurements create consistent success with gluten free doughnuts. These same principles elevate everything from our fluffy gluten-free cupcakes to elaborate celebration cakes.
Embrace experimentation with your gluten free doughnuts: Now that you understand the science behind this gluten free doughnuts recipe, feel confident making small adjustments to suit your taste preferences. Add a touch more vanilla to your gluten free doughnuts, try different glaze flavors, or experiment with mix-ins like mini chocolate chips or dried fruit in your gluten free doughnuts.



Are there any substitutes for the rice flours and potato starch you’d recommend?
Hey! Great question! 😊
So for rice flour, you could try:
Regular all-purpose flour if gluten’s not an issue
Almond flour for a low-carb option
Oat flour works really well too
And for potato starch:
Cornstarch is probably the easiest swap – works almost the same way
Tapioca starch is another good one
Arrowroot powder if you can find it
Really depends what you’re making though! What recipe are you working on? Happy to help you figure out the best substitute for your specific dis
Hi, thank you for responding!
I am trying to make gluten free donuts for my cousin. I can get almond, oat, and cassava (is cassava a good substitute) flour. Is it a 1-1 exchange for all of these substitutions?
I *might* be able to find potato starch, but would corn starch be a 1-1?